
Looking to upgrade your Nerf blaster’s performance? Installing a MOSFET is one of the most effective modifications you can make. As a leading electronic components supplier, we’ll show you exactly how to wire a MOSFET to enhance your blaster’s firing power and response time.
Why Install a MOSFET in Your Nerf Blaster?
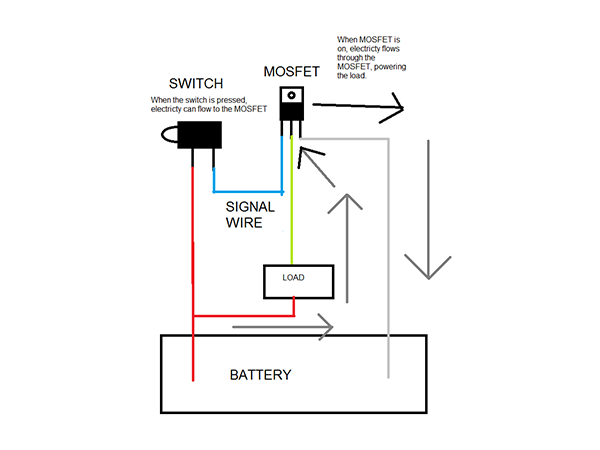 A MOSFET (Metal-Oxide-Semiconductor Field-Effect Transistor) acts as an electronic switch that can handle higher currents than your blaster’s stock switch. This modification offers several benefits:
- Faster trigger response
- Better handling of high-current LiPo batteries
- Reduced wear on mechanical switches
- Improved overall reliability
- Support for higher-powered motors
Required Materials and Tools
| Component | Specification | Purpose |
|---|---|---|
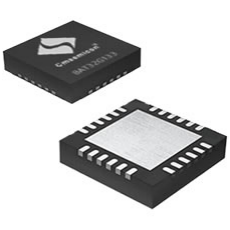
| MOSFET | N-Channel (We recommend Winsok WSF3036) | Main switching component |
| Resistor | 10kΩ | Gate pull-down |
| Wire | 16-18 AWG | Main power connections |
| Solder | Rosin core | Making connections |
Safety First: Always disconnect power sources before working on electrical modifications. Ensure proper ventilation when soldering.
Get Professional-Grade MOSFETs →
Step-by-Step Wiring Instructions
 As a trusted MOSFET distributor, we recommend following these precise steps for optimal performance and reliability.
1. Prepare Your Workspace
Before beginning the installation, ensure you have:
- A clean, well-lit workspace
- All required tools within reach
- A multimeter for testing
- Heat shrink tubing of various sizes
2. MOSFET Connection Points
The MOSFET has three main terminals:
| Terminal | Connection | Notes |
|---|---|---|
| Gate (G) | Trigger switch | Controls MOSFET activation |
| Drain (D) | Motor positive | High-current output |
| Source (S) | Battery negative | Ground connection |
3. Basic Wiring Configuration
Follow this sequence for proper wiring:
- Connect the battery negative to the MOSFET Source pin
- Connect the MOSFET Drain pin to the motor positive
- Install the 10kΩ resistor between Gate and Source
- Wire the trigger switch between the battery positive and Gate
Pro Tip: Our Winsok WSF3036 MOSFET features enhanced thermal management and low RDS(on), making it perfect for Nerf applications.

Testing and Troubleshooting
After installation, verify your work:
- Check all connections with a multimeter before powering up
- Ensure the trigger actuates smoothly
- Listen for any unusual sounds during operation
- Monitor MOSFET temperature during extended use
Common issues and solutions:
- No response: Check Gate voltage when triggered
- Intermittent operation: Verify solder joints
- Overheating: Ensure proper MOSFET sizing
Maintenance Tips
To ensure long-term reliability:
- Regularly inspect all connections
- Keep the MOSFET clean and free from debris
- Consider adding a heatsink for intense usage
- Monitor battery voltage to prevent under-voltage conditions
Why Choose Winsok MOSFETs from Olukey?
- Premium quality components with factory warranty
- Technical support from experienced engineers
- Competitive pricing and bulk discounts
- Fast worldwide shipping
 Ready to upgrade your Nerf blaster with professional-grade components? Contact Olukey today for high-quality MOSFETs and expert technical support.
Need Help? Our technical team is always ready to assist with component selection and installation guidance. Contact us for personalized support and professional recommendations.


-
What are the uses of MOSFETs?
-
The connection between MOSFETs and Field Effect...
-

What Is Pinch-Off Voltage in MOSFETs? Key Conce...
-
How can I tell the difference between a Mosfets...
-

Parameter analysis and measurement of MOSFETs
-

Mastering FET Connections for Seamless Circuit ...
-

MOSFET Operating Characteristics
-

Understanding the 4407A MOSFET: Your Friendly G...
-

Characteristics of Enhanced MOSFETs
-

Understanding Cascode Amplifier MOSFETs: The Ul...
-

Why are MOSFETs voltage controlled?
-

Is the MOSFET fully or half controlled?
-
Enabling High Power Applications: Winsok Mosfet...
-

PCM3360Q High-performance electronic components...
-

Power MOSFET Package Types Guide
-

Fast Switching MOSFETs: The Complete Guide to N...


